Are you a pizza enthusiast looking to take your homemade pies to the next level while using your Kamaod Joe?
Indeed, these grills are known for their versatility and ability to retain heat. This makes them an incredible tool for achieving that perfect, crispy crust.
This article will walk you through making pizza on a Kamado Joe grill. Read on and discover how you can achieve wood-fired pizza results without a wood-fired pizza oven.
So, fire up your grill. Get ready to leave a mark on your friends and family with your new pizza-making skills!
Things You’ll Need for Cooking Pizza on a Kamado Joe Grill
Are you ready to take your pizza-making skills to the next level and cook delicious pizzas on your Kamado-style grill? Yes? Let’s begin with arranging essentials.
Here are the key pieces of equipment you’ll need to make the perfect pizza on a Kamado grill:
Pizza Stone
First and foremost, you’ll need a pizza stone to cook your pizza on. The stone provides a consistently hot cooking surface on top of your grill grate. It gives your pizza that crispy bottom that wood-fired pizzas are famous for.
Infrared Pizza Oven Thermometer
A pizza stone temperature affects how your pizza turns out–cooked, overcooked, or fully cooked. It’s where an infrared pizza oven thermometer helps.
A pizza oven thermometer accurately records the temperature of your pizza stone in the pizza oven or any other cooker like Kamado Joe.
Pizza Peel
A pizza peel is like a giant spatula explicitly designed for launching and moving pizzas. It’s also essential for sliding your pizza onto and off the cooking stone. We recommend investing in a good-quality pizza peel of steel or wood.
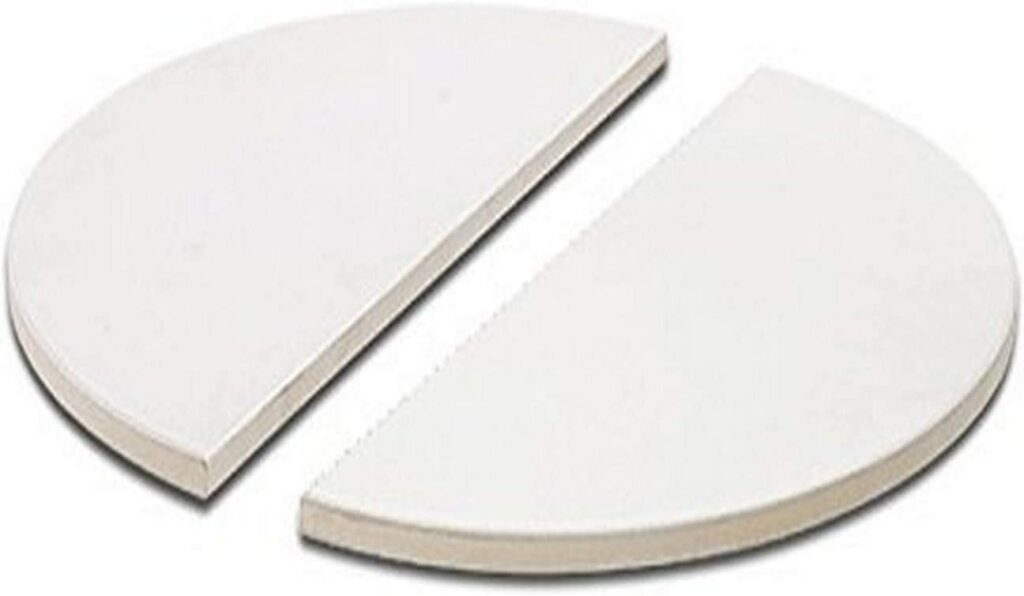
Ceramic Heat Deflector Plates

These plates allow you to cook your pizza over indirect heat, as cooking over direct heat can result in a burnt pizza.
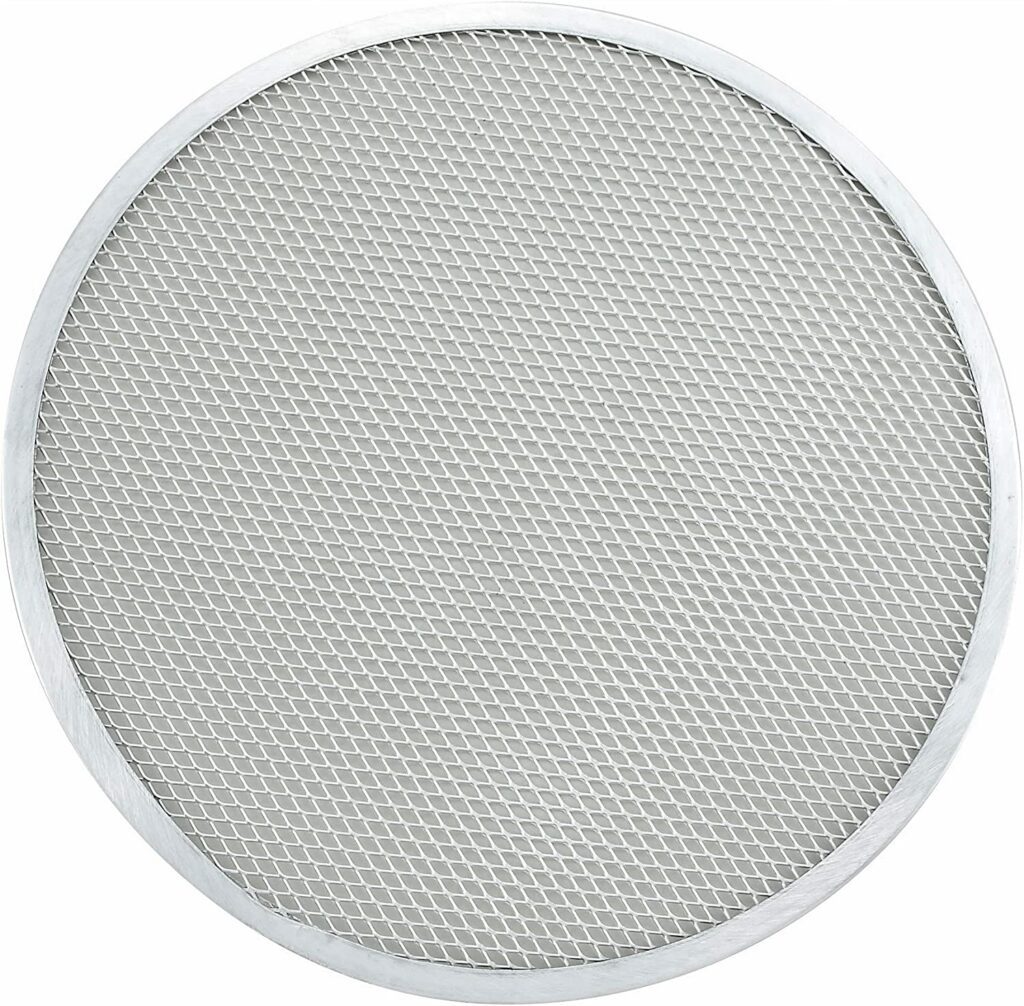
Pizza Screen

While not strictly necessary, pizza screens are recommended for beginners or anyone planning to cook a lot of pizzas.
Made of aluminum mesh to allow airflow, pizza screens make it easier to prepare your pizza. Moreover, you can also transfer it onto the cooking stone without the risk of it getting stuck.
Fuel Source
Regarding fuel sources, charcoal is popular among backyard chefs, who often add oak wood chunks for that wood-fired flavor.
For an authentic wood-fired experience, however, you can use oak wood chunks exclusively or even oak cooking splits or pizza oven firewood, depending on the size of your grill.
Gloves
Heat-resistant gloves are also a must for safe handling at high temperatures. With this equipment, you’ll be well on your way to creating the perfect pizza on your Kamado grill!
Divide and Conquer Cooking Rack
You get a Flexible Divide and Conquer cooking rack with your Kmaod Joe that can help you make the most out of your Kamado Joe grill by letting you set other accessories on it:
When using an accessory rack on the grill:
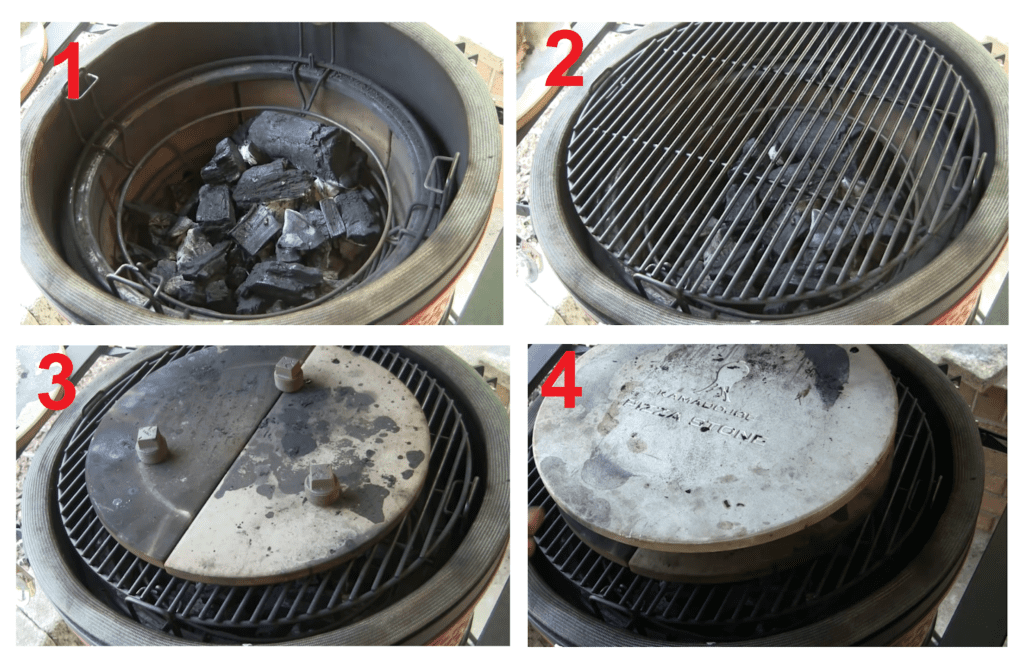
- Set the flexible Divide and Conquer rack first;
- Place the grill grates over the rack;
- Place heat defector plates on it;
- Place 3-4 nuts or small bricks pieces. These will help create a gap between the pizza stone and heat deflector plates.
- Lastly, place the pizza stone on it.
Setting up the Kamado Joe grill

It’s easy to set up your Komado joe pizza grill. Follow these steps to turn your Kamado Joe into a pizza oven:
- First, fill up the firebox with wood/charcoal.
- Next, set your Divide-and-Conquer flexible cooking rack in place.
- Over that, set your accessory rack or your grill grates in the top position.
- After that, place both halves of the heat deflector plates in the middle of the accessory rack or on the grill.
- Use small brick prices or nuts on top of the heat deflector to set your pizza stone. Never set the stone directly on the plate setter.
It’s because the plate setter will transfer all of its heat to the stone, making it too hot to properly cook your pizza. To avoid this issue, it’s critical to create an air gap between the plate setter and the pizza.
The gap will act as an escape valve for the heat energy, allowing it to dissipate before reaching the stone. Thus, it’ll prevent the pizza stone from overheating and burning your pizza.
Preheating the Kamado Joe Grill to Cook Pizza
Preheating your Kamado grill is essential in the pizza-making process to ensure that your pizza cooks evenly. Here’s how to preheat your Kamado pizza grill:
- First, remove the top vent cap and set it aside.
- Next, open your grill’s bottom and top vents to allow maximum airflow and ventilation.
- Add your fuel source, charcoal or wood chunks, to the bottom of your grill. You’ll want to fill the firebox about 2/3 to ensure a consistent heat source.
- Light your fuel source using a chimney starter or electric starter.
- Allow the fire to spread for 10-15 minutes until the charcoal or wood chunks are fully ignited and glowing red.
- Once your fuel source is lit, replace the top vent cap on your grill and adjust the vents to control the temperature. For pizza, you’ll want to aim for a temperature between 500-600°F (260-315°C), which typically requires both vents to be partially closed.
- Allow your grill to preheat for about 20-30 minutes to ensure the cooking surface, including your pizza stone, is fully heated and ready.
- Finally, use a grill brush to clean any remaining debris from your grill grates.
Voila! You’re ready to cook delicious pizza on your preheated Kamado grill!
Preparing the pizza

Once your kamado grill is preheated, it’s time to prepare your pizza. Follow these steps to achieve the perfect wood-fired pizza success!
- First, choose your favorite dough and sprinkle some flour on a clean counter surface. If you’re using a pizza screen, ensure it’s well-oiled or seasoned, or your crust will stick to it.
- Roll out the dough and smooth it out with your fingers.
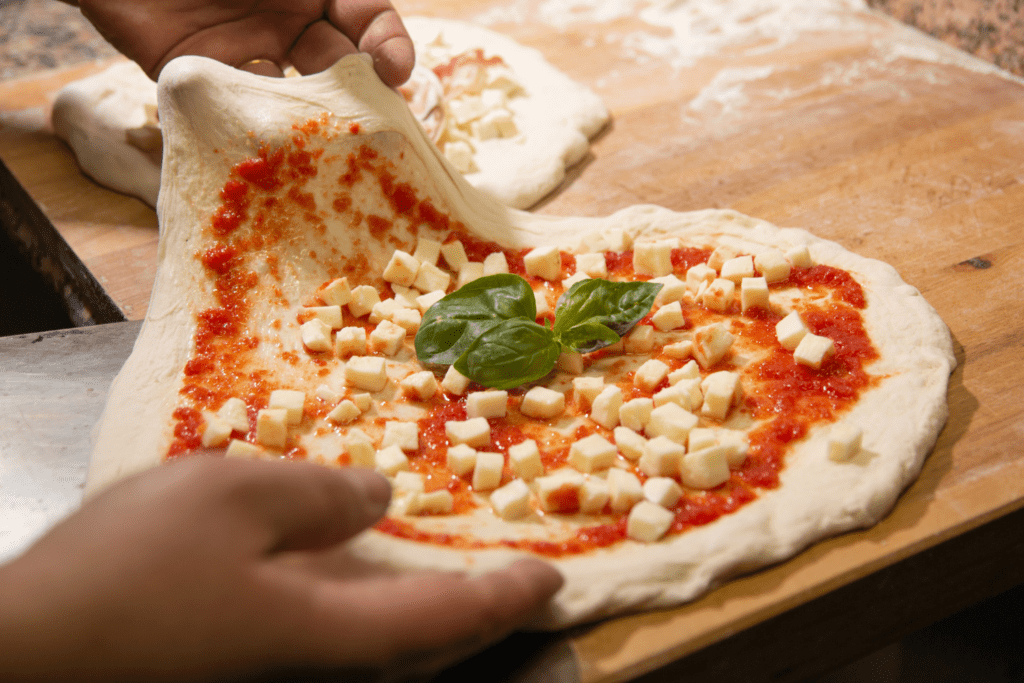
- Then, spoon a thin layer of pizza sauce over the dough and add a layer of your favorite cheese.
- Put some fresh basil over the cheese.
- Put on your gloves, and slide the pizza peel under the screen.
- Open your grill to slide the screen and pizza onto the stone. If you’re not using a pizza screen, sprinkle a ton of cornmeal on your pizza stone and peel to prevent sticking.
- Cook your pizza for 5 to 10 minutes, keeping an eye on it to ensure it doesn’t burn.
- Once it’s done, remove it from the Kamado and let it cool.
- Keeping it on the pizza screen will keep the underside of the crust crispy by allowing moisture to evaporate outwards.
And voila! You’ve just cooked a delicious pizza on your Kamado grill.
Bonus Tips and Tricks for Making a Kamado Joe Pizza
We deeply care about our readers. Therefore, we went out of our way to curate a list of helpful tips for you. We want you to make the most of your Kamado Joe pizza grill to satisfy you.
Keep reading for more!
Begin at a lower temperature.
If you want to make a pizza on your Komado joe, starting at a lower temperature could be a great place to begin. Cooking your pizza at 500°F (260°C) may allow you more wiggle room for error than if you started at a higher temperature, like 700°F (371°C).
In contrast, starting at a lower temperature allows you to practice and refine your pizza-making skills. Besides this, it also saves you from burning or overcooking the crust or toppings.
Once you’ve mastered the basics and gained confidence, you can always increase the heat and experiment with different cooking times and techniques.
After all, practice makes perfect!
Use your Charcoal Wisely.
- When making great pizza on the Kamado Joe grill, one thing that can make or break your success is the charcoal you use. One thing to be cautious of is charcoal which produces a lot of flames, even after it has been fully engulfed. It can create a chemical odor that can be absorbed by the pizza crust, ruining the flavor of your pie. So, choose a brand that only creates a small flame.
- Another thing to keep in mind is the size of the charcoal pieces. While placing larger pieces on the bottom is vital to allow for proper airflow–you may have lower temperatures and a longer cooking time if the pieces are too big.
- You can also add a few wood chunks to your fire to get an extra smokey flavor in your pizzas–you won’t miss wood pizza ovens.
Know which pizza stone you should use.
There’s a lot of variability in the market when it comes to pizza stones. Kamado manufacturers offer heavy-duty stones that can handle temperatures of up to 700°F. However, some kitchen supply companies make stones that are only suitable for home ovens and can only withstand temperatures of up to 500°F.
When choosing a pizza stone, select one heavy enough to withstand high temperatures and provide a suitable surface for your cooking style. However, be cautious of stones larger than the deflector’s diameter. They can block airflow and get energy directly from the fire without the benefit of deflection.
In short, Look for some durable stone that can withstand high temperatures and has the appropriate porosity to draw moisture out of the crust.
Light the Kamado Joe Grill.
When lighting a Kamado Grill for pizza, please take it seriously!
There are differences between low-temperature and high-temperature cook lighting, especially for pizza at 600°F or more.
You need a big fire, so use a full load of fresh lump charcoal.
Light the lump in multiple places, so the fire can spread and engulf more fuel.
Allow the fire to get ready as you load in all of the internal components, and leave the top dome open for a few minutes to let the fire get big.
Also please ensure that your ceramics, such as the plate setter, pizza stone, and oven walls, soak in the heat for at least 30 minutes before cooking your first pizza. This is important because a pizza will stick to a stone that is less than 400°F.
Be mindful of the pizza toppings.
Creating a homemade pizza is a great way to showcase your creativity and flavor preferences. But be careful not to go overboard with toppings. Too many toppings will result in a steamed pizza instead of a roasted one, and the crust will become soggy and unappetizing.
The key is to balance the sauce, cheese, and toppings and keep the pizza manageable with enough ingredients. Even if you want to add extra cheese or veggies to pizza, tap-dry these toppings using a paper towel to eliminate excessive moisture.
Also please remember that a well-crafted pizza should have a crispy crust, a flavorful sauce, and toppings that complement each other, not compete for attention.
Use cornmeal to save the day.
Using cornmeal is necessary when making a pizza on a Kamado Joe grill. It helps prevent the dough from sticking to the pizza peel, making transferring the pizza to the grill easier.
Furthermore, the cornmeal acts as a barrier between the dough and the peel, allowing the dough to slide off easily onto the grill. If you find transferring the pizza dough to the peel difficult, sprinkle some cornmeal onto the peel before placing the dough on it.
Experiment with higher temperatures
We know we said to start off with lower temperatures but hear us out. The Kamado Joe grill is an ideal alternative for cooking pizza at high temperatures, over 500℉, which is impossible with a regular oven. This high heat allows you to achieve a perfectly crispy crust that cannot be replicated in a conventional oven.
The intense heat creates a unique texture and flavor that will take your pizza to the next level. You can perfectly cook the pizza with the ability to control the temperature. So, play with the temperature settings and experiment with different temperatures.
If you carefully follow all the tips, no one can stop you from making the best pizzas on Kamado Joe.
FAQs
How Should you clean your Kamado Joe Grill?
Cleaning your grill is a must when cooking pizza on a Kamado Joe. The last thing you want is for your delicious pizza to taste bad from a dirty grill.
When cooking at high temperatures, the grill will burn off any leftover debris, creating an unpleasant smoke. To prevent this from happening, be sure to remove any ash buildup and safely wipe off the inside of the grill before cooking your pizza.
Your taste buds will thank you!
Is Dojoe, Pizza insert KamadoJoe worth it buying?
While the DoJoe pizza insert for Kamado Joe grills can be a great tool for pizza-making enthusiasts, yet, it may not be the best option for everyone for a few reasons:
- Firstly, the DoJoe insert may not be necessary if you already have other pizza-making tools or methods that work well for you. For example, if you already have a pizza stone you love using, then the DoJoe insert may not significantly benefit your cooking style.
- Secondly, the DoJoe insert can be a bit pricey compared to other pizza-making options. If you’re on a tight budget, you may want to consider relatively cheaper methods as mentioned in this guide.
What style of pizzas can I cook in Kamado Joe Grill?
You can make a variety of styles of pizzas on a Kamado Joe grill, including, Neapolitan pizza, New York Style Pizza, Chicago Style Pizza, and California Style Pizza.
Just ensure you have the right equipment, like a pizza stone or deep-dish pan, and experiment with different temperatures and cooking times to achieve the perfect pizza for your taste.
Final Thoughts
Cooking pizza on a kamado grill can be a great way to try something new and enjoy the unique taste of a wood-fired pizza. By following the tips and tricks outlined in this article, you can seriously elevate your pizza-making skills!
So, why not take the leap and invest in a Kamado Joe grill today?
mama-cucina.com is a participant in the Amazon Associate program and will earn from qualifying purchases.

