
They cracked a joke. Yeah, I’m talking about a pizza oven for a Weber grill (kettle pizza oven kit)!
Even America’s kitchen is calling it the best grill pizza kit…!
The professionals are recommending it!
Why?
They can handle a pizza better than us—from kneading the dough to rotating the pizza in the ovens. Yet, the occasional pizza maker like you or me fell in trouble – even after spending the hard-earned money!
Pardon me, my friend! I might sound practical, but my points will certainly help you with your pizza-making experience in Weber charcoal grill, besides saving you money.
My simple advice will be don’t buy it, and it’s no way a wood-fired pizza oven!
So, why should you read this article from me?
Besides explaining the technical drawbacks of the Weber pizza kit or any other attachment of such type, I’ll also help you make a pro-like pizza on your Weber Kettle without using such extensions.
Will you like to continue with me?
Ok, let us get into this 15-minute read.
Top 4 Reasons Why Shouldn’t you Use a Weber Kettle Pizza Oven Kit?
Here are the 4 things that can disappoint you when using the Weber Kettle Pizza oven accessory kit.
1- The opening is too wide to let the heat escape.
The pizza ovens of gas or wood-fired produce bursts of heat in the form of high flames which roll inside the oven dome. This heat is retained in the oven’s floor and ceiling simultaneously.
The retained heat produces convection inside the oven chamber to cook your pizzas or bread.
On the other hand, the Weber Kettles, or even Smokey Mountain, cannot reach the desired convection, especially in the air/environment, no matter if the pizza stone surface is as hot as 700-900 degrees Fahrenheit. This contrast is the actual reason behind the failure.
In this situation, the wide opening of the Kettle pizza attachment does more harm than good. The heat escapes, the pizza cooks less evenly, and you must rotate it vigilantly—but you can’t do it easily.
How?
I’ll explain it later.
What I mean is the Weber Kettle Pizza attachment lacks a front door which is why the pizza stone temperature remains higher while the air temperature is lower.
What happens in such a case???
Your pizza crust cooks faster, while pizza toppings and pizza tops are not perfectly cooked. Besides this, you don’t get a charred pizza on top of what we know as leopard spotting.
2- The opening height is insufficient to let you freely move your pizza.
The key rule to cooking your pizza on a grill exactly like a wood-fired oven is to let your pizza stone/steel reach an optimum temperature of 800-900 degrees Fahrenheit and have a similar or higher temperature in the air.
It’s the point where your pizza cooks within a minute, and you have to rotate it faster so that it cooks evenly.
Not only this, but when you slide off your pizza on the pizza stone, the oven opening has to be high enough to let you launch your pizza easily. The Kettle pizza attachment fails here again. Its opening is only 3.5 inches high, which is further reduced when you place 0.5 to 0.75 inches thick pizza stone inside the grill.
With a Kettle Pizza Oven Kit, you don’t get such luck!
How?
Regular non-electric portable pizza ovens like Ooni of Gozney Roccbox have an opening of about 3.5 to 6 inches high. In contrast, the pizza stone sits flat and doesn’t reduce the opening height anymore. Hence, you can place your pizza inside the oven easily.
Let me clarify one more thing… When grilling pizza on a charcoal grill, it’s advisable to use some heat deflector plate (some pizza, some other pizza stone, firebricks, or pizza steel) under your main pizza stone to save it from a heated sock. Otherwise, it’ll break.
But, when using a Kettle Pizza Kit, you can’t keep such type of heat deflector under pizza stolen, for it’ll elevate it further and become more challenging to set or rotate your pizza on it.
HELL!
2- You get less pizza stone surface for controlling your pizzas.
There is another surprise for you with the Weber pizza oven kit!
You place the pizza stone over the grates. It’s in the middle, right?
The empty area around the stone keeps you afraid that you might drop your pizza while launching or rotating it—you’re gradually losing freedom.
Obviously, it seems pretty impractical.
I have seen dozens of pizza professionals praising Kettle pizza attachment.
They must do it!
The reason is that they’re pizza pundits and can do every operation excellently, from stretching the pizza dough to baking it!
3- DIY Weber pizza oven is positioned too low to allow you to monitor your pizza progress.
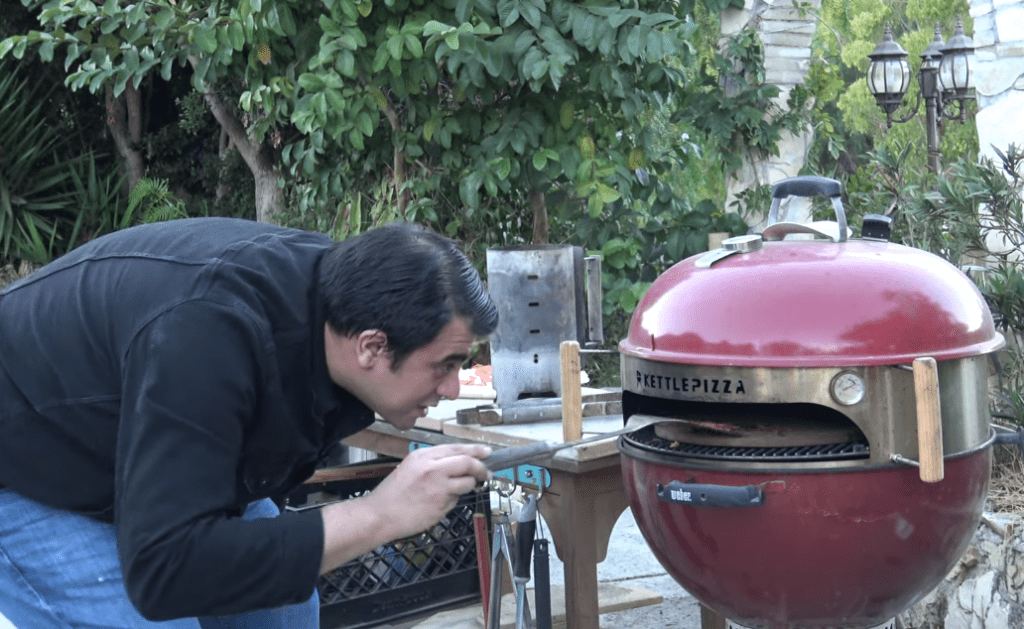
I have got very little to say at this point. Look at this image, and you’ll know it all!
Still, I feel eager to make a bit of a calculation for you.
My friend, sitting in the kettle grill, the pizza oven is about 30 inches from the ground level.
On the other hand, placing a portable gas or wood pizza oven with 6-8 inches high legs and when placed on a 28-30 inches high prep or grilling table is about 10 inches up. Thus, it’s approximately 40 inches high, so you can easily monitor and watch your pizza.
4- The DIY Weber Kettle Pizza oven design is less functional.
Have you ever seen a wood-fired pizza oven?
OK, we don’t go too far; let’s talk about tabletop pizza ovens like Ooni or Gozney.
These ovens have a high flame coming from the rear burner or L-shaped burner that spreads along the pizza oven doom to get radiated heat to cook your pizza tops, besides heating the pizza stone underneath.
Resultantly, the pizza stone temperature is about 700-900 degrees Fahrenheit, and the air temperature is higher than this.
For instance, if the oven surface is about 700 degrees, the air temperature will be 800. So, you get a pizza with a fully charred crust and toppings.
Sadly, placing the kettle pizza attachment ruins the concept instead of “making” it. The grill lid, which is supposed to act as a pizza dome and deflect heat, rests too high. The flame (even if you succeed in producing them) doesn’t benefit your pizza topping, but a little.
In short, inside the kettle pizza oven, the temperature variations are more drastic–the pizza stone temperature is much higher than the air temperature. And, if you wait to color the pizza top, the bottom will be burnt.
Worst!
What should you do then? Here are Three Solutions!
These 3 solutions will help you if you’re determined to make pizza on your charcoal kettle grill.
Out of these 3 solutions, the second is more workable, and the third is the best, though I’ll discuss it all.
1. Use your Pizza oven kit the right way.
Please read the first one if you already have got the Kettle Pizza Kit.
To successfully cook pizza on a Weber Kettle using this Kettle Pizza Kit, you have got a few things to do.
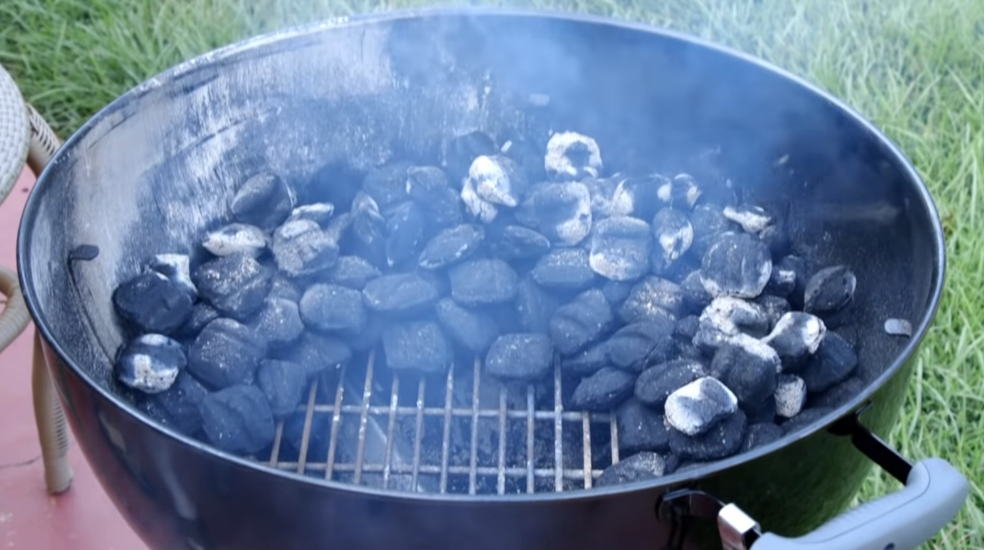
- First, set up your grill the right way–set up the charcoals in the rear and light them.
- Place a wood box or wood chunks over these charcoals in the rear area only so that you see visible high flames heating the dome. It’ll deflect sufficient heat to cook your pizza toppings faster.
- Keep all the vents open, so the grill attains its maximum temperature to heat your pizza stone.
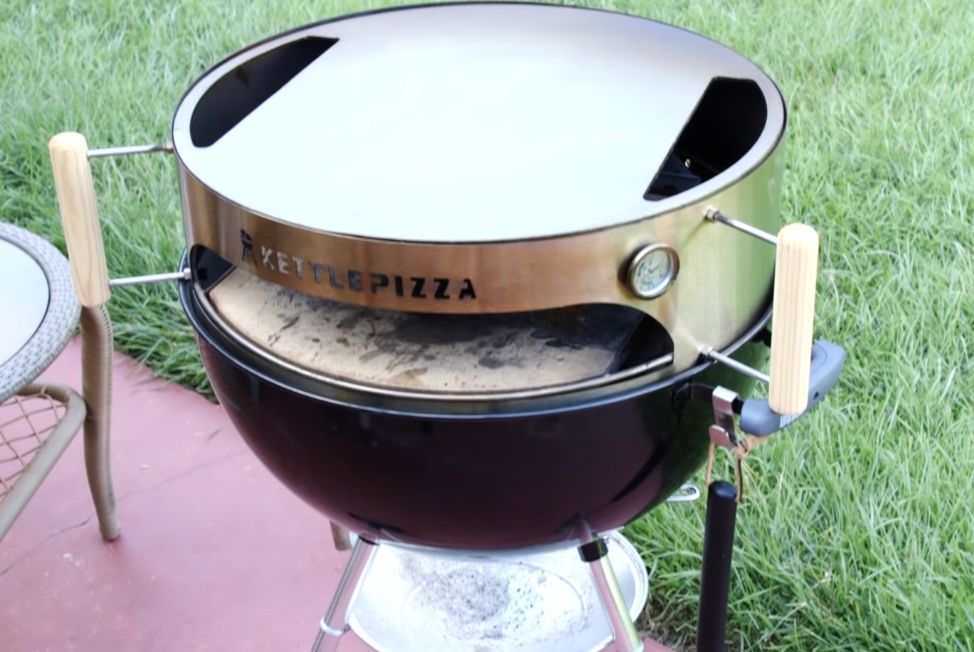
- Also, place a steel lid over it. Otherwise, the lid dome will be too high to radiate any heat.
- Try to use a wide square pizza stone or steel that’ll give you more freedom to move your pizza.
- Use a metal pizza peel, if possible–it’s thin and easier to move pizza in such a limited opening.
- When you place the lid on the Weber grill, keep the lid vents on the front side, over the oven kit opening.
- Preheat your grill until the infrared thermometer shows an 800-900 degrees Fahrenheit temperature. At such a high temperature, your pizza will start to cook as it does in the wooden oven.
Besides following the Weber Kettle Pizza manufacturers’ instructions, I hope you’ll take care of these guidelines and get the best out of them.
2. Cook pizza on a Weber charcoal grill using a few pizza accessories!
Ahhh!
A less expensive, more functional solution is here. You need only a few pizza-making accessories and these guidelines.
Should we begin?
Why not?
Here we do!
Things you need
- Two pizza stones or pizza steels
- Pizza peel
- 4-5 nuts or fire bricks
- Infrared thermometer
Step#1 Set up your Weber charcoal grill and place the pizza stone.
Setting up a kettle charcoal grill isn’t difficult. There are several ways, yet here you’ve to do it partially: using the snake method.
Then light it and place the grill grates over it.
Place a heat deflector plate on the grill grates. Then place a few nuts on this deflector plate to support the pizza stone, which you’ll place over the heat deflector plate. Thus, your pizza stone will get convection heat for safe preheating, as it’ll prevent the pizza stone from shock.
If you don’t have a heat deflector plate, you can use some pizza steel, or even a few fire bricks can also be wonderful.
Note: During the entire preheating and baking process, keep the lid vents opposite to the charcoal side.
Step#2 Preheat the pizza stone.
Weber Kettles are well known for getting extremely hot. When the grill has been lit, preheat the pizza stone for about 25-40 minutes until your infrared digital thermometer tells your pizza stone temperature is about 800-900 degrees Fahrenheit.
At this point, put a few wood chunks on the coals to produce high flames, roll along the Weber Kettle dome, and cook your pizza toppings and crust.
Note: If you remove the lid, the grill’s temperature will fall about 2000 degrees–not a big deal, you’ll place it again.
Step#3 Place your pizza and cook it!
Finally, when the pizza stone shows the right temperature, place your pizza on it and cover it. If the flames are high in your grill, check your pizza after 30-40 seconds by opening the lid.
Yet, if you’ve only seen a few or no flames in the grill, but the pizza stone is hot, about 800-900 F, wait for 1 minute.
Likewise, if the pizza stone’s temperature is about 700 degrees Fahrenheit, wait 3 minutes before opening your kettle grill lid.
3. Get a portable gas or wood pizza oven!
Let’s be more advantageous. If you bake pizzas often, the third solution is for you. You can find dozens of portable gas, wood pellets, or wood-fired pizza ovens from reliable brands like Ooni or Gozney.
These will cost you around 2-3X more than the Kettel pizza kit, and I hope you won’t mind it keeping the benefits in view.
If you think such an investment can take some time, please make pizzas on your Weber Kettle using our second solution. It’ll be more peaceful!
Give these solutions a try, and let me know in the comment section.
mama-cucina.com is a participant in the Amazon Associate program and will earn from qualifying purchases.